Golden section, foreground, lines: Many rules of photography also apply to trekking photography — including the rule that you should break the rule now and then. Apart from the image composition, however, there are some practical differences when you are more than a day’s walk away from civilisation.
Weight
Minimal weight without sacrificing the most important things is the most important rule on long treks. This applies to outdoor equipment such as tents and clothing as well as to photographic equipment. Often you also have to carry a few kilos of food and still want to be able to enjoy the landscape during a climb of 1000 metres in altitude … If you are travelling without porters or donkeys, you have to leave many things at home. While the weight of food, tents and jackets can only be reduced to a limited extent, it is a question of finding a good compromise for the photographic equipment, which also depends on your own physical condition. I usually carry three zoom lenses for my SLR camera, one in the normal range that is almost always screwed onto the camera, one wide-angle and one tele lense. I usually leave the macro lens, fixed lenses and flashes at home. I do miss the macro sometimes… A tripod should also come along. Some people swear by table tripods (which are rarely suitable for telephoto lenses, but that’s exactly what you need them for) or the Gorillapod. I use the Rollei Compact Traveller No. 1, which weighs about 1 kg, but is a good compromise for me in terms of weight, size and stability, and it is also suitable for macro photography just above the ground. During the day it usually hangs on my backpack.
Storage
Digital cameras tempt you to press the shutter twice more rather than once too little. On a trek lasting several days, dozens of gigabytes quickly accumulate. I always have a couple of large SD cards in my camera bag. On longer trips I use a small freezer box for waterproof storage of additional memory cards, but during treks I usually leave it in a hostel with all unnecessary luggage. Based on previous trips, you can roughly estimate the daily amount of data, but you should round up generously. Cards are relatively cheap now. Prices vary greatly from country to country and are generally high in remote places, so it is seldom advisable to buy more while travelling.

Batteries
On many treks it is not possible to recharge the batteries on the way. On hikes lasting several days, spare batteries should therefore be included in the luggage (the charger can be left in a hostel). For me, 3 batteries are enough for 10-14 days if I try to save energy. Of course, this varies depending on the camera and on photography habits. The most important thing is to refrain from browsing through the pictures! The temptation is great, but this evening activity quickly uses up as much energy as would have sufficed for a whole day. I have always turned off the annoying beep sound and reduced the brightness of the LCD display a little. I only use the Live View in exceptional cases. In extreme cold, you should keep the spare batteries warm, for example in the inside pocket of your jacket. Modern lithium-ion batteries are surprisingly resistant to the cold. If the batteries do run low, I turn off the LCD display and the autofocus and use manual focus. In some regions it is possible to charge the batteries in the huts.
Be ready
The camera should always be within easy reach. It only goes in the backpack in heavy rain, it’s far too cumbersome and energy-consuming to constantly put the backpack on and off, and for many subjects you’d be too slow anyway. I usually attach the camera bag to the side of the hip belt, so that it doesn’t slip when I open the belt. On routes with a particularly good view, I hang the camera upside down (with the flash shoe down) around my neck: if I then slide an arm through the neck strap so that it doesn’t dangle in front of my chest, the edge of the housing doesn’t press into my ribs. The camera should be set with usable values right from the start, especially exposure mode (e.g. Av and aperture suitable for standard situations) and ISO.
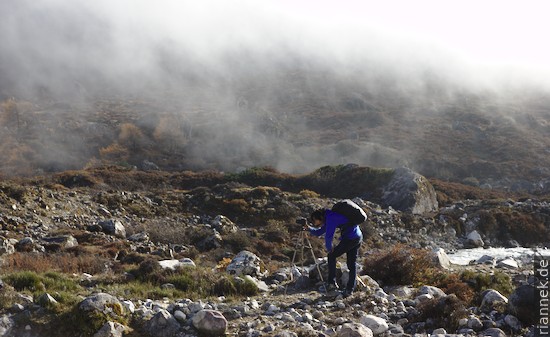
Light and Weather
Capturing the right light is just as important for landscapes and outdoor photos as for other genres. At midday, even high mountains look boringly flat, while a low sun sculpts them vividly. And in the hour before and after sunrise and sunset, there are the warm tones, orange-bright rock faces and red clouds. The decision whether to wait for better light at a point with a good view or to go a little further is not always easy…
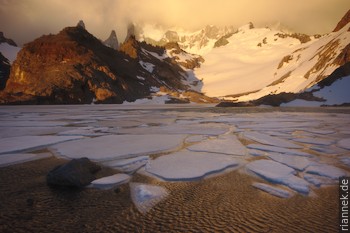
In perfectly good weather with cloudless blue skies, it’s easy to get pictures that would be good for a postcard but still look a bit boring. A few clouds often make the picture more interesting, breaking up the sky as white specks or giving a measure of the height of a mountain towering above them. With a bit of luck you can get particularly dramatic light in changing weather, such as a black wall of clouds pushing across the sky or when it clears up after some rain. Very heavy cloud cover can give good light for macro shots or portraits, even when the mountains are no longer visible. Only in heavy continuous rain the possibilities are limited, but atmospheric pictures in a forest, for example, are still possible.
Back light
Back light can also produce great shots. You should never forget the lens hood and, if necessary, shield up with your hand to avoid bright spots or flares. If the sun is low in the sky or if you use a wide-angle lens, you can also get the sun in the picture. Especially in the second case, it looks good if the aperture is closed as far as possible (e.g. F/32), you will get real rays of sunlight. A UV filter should be unscrewed because it can cause flares.
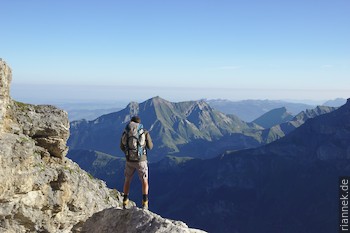
Planning
In order to be in the right place at the right time, you should plan your route accordingly. You don’t want to be on the best viewpoint for lunch, but with the best light! I research the best viewpoints before the trip and consider from the map whether the light is better there in the morning or in the afternoon. Then I plan the overnight stays accordingly. Sometimes I camp in exposed places, or I start climbing hours before sunrise. Regularly, on one day I cover a particularly long distance to reach a certain point by evening, on another day I stay in one place for hours. Because of the photography, the division of the stages is completely different from what is recommended in most books. And you should be flexible depending on the weather. Especially in regions like Patagonia or Scandinavia, I always plan extra days for bad weather. I’d rather wait in the tent with a book for two days in pouring rain and then see the view after all than walk on soaking wet and later think I have to come back here again. The weight of the food, however, also sets limits to spontaneity here.

Rain
In the rain, the camera remains largely protected in the camera bag, in a plastic bag or under the rain jacket and is only taken out for the picture. A few drops on the camera are not a problem, however. The lens hood is important, as it protects the lens from water in this case. An optical cloth is also practical, with which you can dry the lens (as long as it is dry).
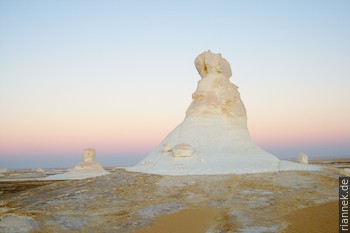
Dust
In deserts, at volcanoes or on dusty tracks, it can happen that a lens starts to crunch or even becomes blurred – then everything is too late. If a jeep is approaching in a cloud of dust, you should get your camera to safety in good time: Close the zip of the photo bag or wrap the camera in a plastic bag. When changing lenses, turn your back to the wind and move as quickly as possible in the lee. Keep the camera bayonet pointing downwards. Place the camera bag on a jacket rather than on dusty ground. In particularly dusty areas, plastic bags or rubbish bags can be helpful.
RAW
I only shoot RAW because it is the only way to rescue an image that is not perfectly exposed or to deal with a strong contrast between light and dark areas. However, this means that every image must first be “developed” with software. Those who do not like to edit images but want the result directly from the camera should at least set the camera to RAW+JPEG so that in case of doubt they can still fall back on the RAW file for the one or other image.
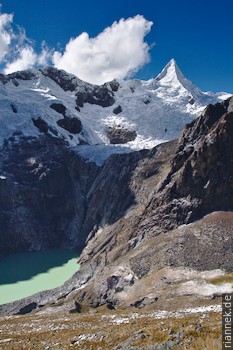
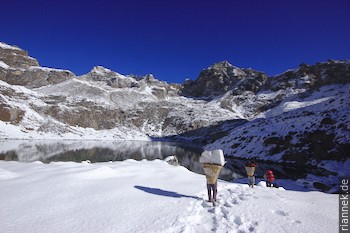
Snow Mountains
Snow-covered or glaciated mountains on the other side of the valley are something else than photographing in the snow itself. The contrast between bright white snow and a forested or shady valley is often so great that the camera can hardly cope with it. Here, the right exposure is especially important! This should be checked after each click by looking at the histogram. The details on snowy slopes should remain visible. Very small areas with blown out highlights are not necessarily a problem, but if a larger area is blinking, the exposure needs to be changed. In the histogram, however, the peak of the snow should be NEAR the right edge in order to preserve as much detail as possible in the darker parts. As a first approach, I like to set the camera to spot metering, the exposure compensation to +2 and then meter to the brightest area in the picture. It may be worthwhile to set the camera to M after taking a test picture, and correct the exposure using the histogram, because you will never get exactly the same spot the next time you take a reading. When developing from the RAW file, a lot of details can still be conjured up from the dark areas. If in doubt, I use exposure bracketing.
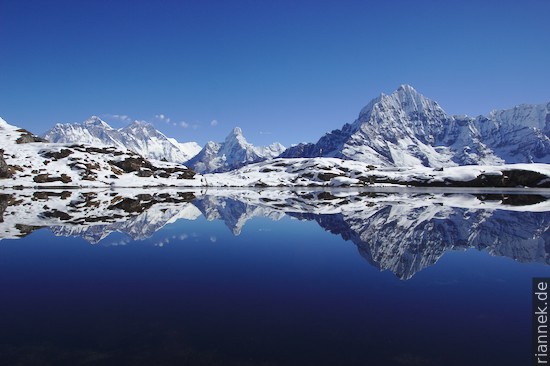
Mirror Lake
The reflection of a landscape in a lake often looks very appealing. With larger lakes, you only have a chance on completely windless days in sheltered bays; small cirque lakes or even small ponds are better suited.